

Getting started with cryptocurrency-related applications can involve learning several technical concepts. Beginners may need to understand trading software, exchange APIs, server resources, remote connections, and application security. When these applications need to remain available continuously, running everything on a personal computer may become inconvenient.
Bitcoin VPS hosting offers a remote computing environment where users can install and operate cryptocurrency applications independently of their local devices.
Although the setup process may initially seem complicated, it becomes easier when divided into manageable steps.
This guide explains how beginners can choose, purchase, configure, and manage bitcoin vps for cryptocurrency-related activities.
Step 1: Understand What VPS Hosting Does
A Virtual Private Server is a virtual machine hosted on a physical server.
A hosting company divides the physical server’s resources into separate virtual environments using virtualization technology.
Each customer receives allocated computing resources such as CPU, RAM, storage, and network connectivity.
Users can install an operating system and compatible applications.
A Crypto VPS is generally a VPS used for cryptocurrency-related activities such as automated trading, market monitoring, and software development.
It does not automatically mean that the server participates in cryptocurrency mining or blockchain validation.
Step 2: Decide What You Want to Run
Before purchasing hosting, identify your intended applications.
Some beginners want to run one automated trading bot.
Others may need a market-monitoring tool, portfolio tracker, or development environment.
Different applications require different resources and operating systems.
Check the developer’s documentation and identify the recommended CPU, RAM, storage, and software requirements.
This information will help you avoid purchasing an unsuitable hosting plan.
Step 3: Choose a Hosting Provider
Research several hosting companies before making a purchase.
Compare their server locations, hardware specifications, uptime commitments, security features, and customer support.
Read independent reviews and check whether customers report repeated problems.
Also examine the provider’s refund policy, billing conditions, and renewal prices.
Avoid choosing a company solely because it advertises the lowest price.
Step 4: Select an Appropriate VPS Package
Hosting providers generally offer several configurations.
A basic package may be suitable for a lightweight application.
More demanding software or multiple applications may require additional CPU and RAM resources.
Storage capacity should also be considered, particularly if the software stores logs or historical market data.
Start with a suitable configuration rather than purchasing the most expensive package.
You can upgrade later if resource consumption increases.
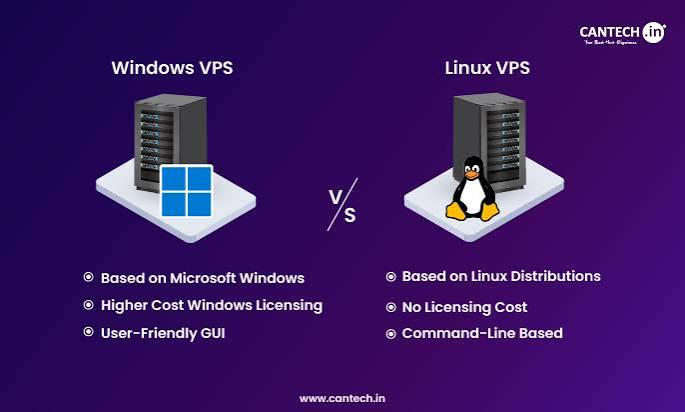
Step 5: Choose Windows or Linux
Operating system selection depends on application compatibility.
Windows VPS hosting provides a familiar graphical interface and can support Windows-based trading platforms.
Linux VPS hosting is often used for development scripts, Python applications, and server-side software.
Beginners should review the official software requirements before selecting an operating system.
Step 6: Purchase Your VPS
Once you have selected a provider and configuration, complete the purchase.
The provider will generally send an email or display server information in the customer dashboard.
This information may include:
- Server IP address.
- Username.
- Initial password.
- Operating system details.
- Remote connection instructions.
Keep these details secure and do not share them with unauthorized people.
Step 7: Connect to the Remote Server
For Windows VPS hosting, use Remote Desktop Connection.
Enter the server IP address and provide the login credentials.
After successful authentication, a remote desktop environment should appear.
For Linux, use an SSH client or terminal.
Once connected, confirm that the operating system is functioning properly and that you can access the required administrative settings.
Step 8: Update and Secure the Server
Before installing applications, update the operating system.
Configure a firewall and disable unnecessary services.
Create strong passwords and enable multi-factor authentication where supported.
Restrict remote access where practical and avoid installing software from unknown sources.
These steps help establish a safer environment.
Step 9: Install Your Cryptocurrency Application
Download the required application from its official source.
Follow the installation instructions and check that all dependencies are correctly configured.
If the application requires programming libraries or additional software, install the recommended versions.
After installation, test the application before connecting it to a live cryptocurrency exchange.
Step 10: Configure Exchange API Access
Many trading applications use exchange APIs to retrieve market data and submit orders.
Generate API credentials through the official exchange account settings.
Enable only the permissions required by your software.
For a basic trading bot, withdrawal permissions should generally remain disabled.
If supported, restrict API access to your VPS IP address.
Never share API secrets publicly or store them in unsecured files.
Step 11: Test the Application
Testing is essential before relying on automated software.
Use a demonstration environment or simulated trading mode whenever available.
Check whether the application receives market information correctly.
Review its logs and confirm that API communication works.
Also test how the software behaves when the server restarts or temporarily loses connectivity.
Step 12: Configure Background Operation
If the application needs to operate after you disconnect from the server, configure it to run independently of the remote session.
Windows users can use suitable startup or scheduled-task settings.
Linux users may configure background services.
Test the configuration to confirm that the application restarts safely after a reboot.
Avoid enabling automatic order execution without understanding how the software handles reconnections.
Step 13: Monitor Server Resources
Regularly check CPU usage, RAM consumption, storage capacity, and network connectivity.
If the server consistently reaches its resource limits, the application may become slow or unstable.
Upgrade the configuration if actual workload requirements justify it.
A bitcoin vps should provide enough resources for the applications being operated.
Step 14: Maintain Regular Security Practices
Security should continue after the initial setup.
Update the operating system and applications.
Protect login credentials and API keys.
Review access permissions and monitor unexpected activity.
Create backups of important configurations and application data.
These practices can help reduce operational and security risks.
Step 15: Understand the Limitations of VPS Hosting
A VPS provides remote computing resources, but it cannot guarantee profitable trading.
Market conditions, trading strategies, exchange availability, API limitations, and software errors can all affect results.
Even a reliable server may experience maintenance or unexpected interruptions.
Beginners should understand these limitations and avoid depending entirely on automated applications.
Final Thoughts
Bitcoin VPS hosting can provide beginners with a convenient way to operate cryptocurrency applications remotely.
By following a step-by-step setup process, users can select suitable hosting, configure an operating system, install software, connect exchange APIs, and monitor applications.
A properly configured crypto vps can reduce dependence on personal computers and support continuous application operation.
The most important considerations are selecting appropriate resources, maintaining security, testing software carefully, and monitoring server performance regularly.