Navigating the WPS official website reveals a suite of powerful productivity tools designed to rival the biggest names in office software. Among its most appreciated modern features is the system-wide dark mode, a visual theme that transforms the bright, standard interface into a sleek, darker palette. This mode is favored for reducing eye strain during long working hours, especially in low-light environments, and for conserving battery life on laptops with OLED or AMOLED screens. For users of WPS Writer, Presentation, and Spreadsheets, enabling dark mode creates a consistent, focused workspace across all applications. This comprehensive guide will walk you through the simple steps to activate and customize dark mode on your PC, ensuring a more comfortable and visually cohesive experience throughout the entire WPS Office ecosystem.
Understanding the Benefits of Dark Mode in WPS Office
Before delving into the activation process, it is worth understanding why dark mode has become an essential feature. The primary advantage is reduced eye strain. The high contrast between black or dark gray backgrounds and light-colored text minimizes the emission of blinding white light, making it easier to focus for extended periods. Secondly, it can contribute to energy savings on compatible displays. Furthermore, for many users, the sleek, modern aesthetic of a dark interface is simply preferable, offering a professional look that is easy on the eyes. By visiting the WPS official website, you can read about the continuous updates and user-centric design philosophy that led to the implementation of this feature, ensuring it integrates seamlessly across the Writer, Presentation, and Spreadsheets modules.
Step-by-Step Guide to Enabling Global Dark Mode
Enabling dark mode across all WPS Office applications is a straightforward process managed through a central settings menu. The following steps will activate the theme universally on your PC.
First, open any WPS Office application, such as WPS Writer or WPS Spreadsheets. Look for the “Home” tab or menu bar at the top of the window. On the far left, you will typically find a dropdown menu labeled “File” or sometimes a settings cog icon. Click on this to open the application’s main menu. From this menu, select “Options” or “Settings.” This will open a new dialog box with various customization choices for the software.
Within the Options window, navigate to the “View” or “General & Save” section. Here, you should find the theme settings. You will see an option labeled “Theme,” “Office Theme,” or “Interface Theme.” The default setting is usually “Light.” Click on the dropdown menu next to this option. You will be presented with choices, which typically include “Light,” “Dark Gray,” and “Black.” Select either “Dark Gray” or “Black” based on your visual preference. The “Dark Gray” option offers a softer, slightly lighter dark theme, while “Black” provides the deepest contrast.
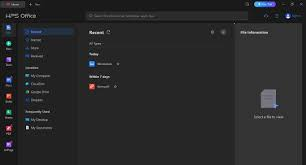
Once you have selected your preferred dark theme, click the “OK” or “Apply” button at the bottom of the Options window. The change will take effect immediately. You will notice the entire application interface, including the ribbon, toolbars, and background, switch to the dark theme. Crucially, this setting is synchronized across the WPS Office suite. Therefore, when you open WPS Presentation or WPS Spreadsheets, they will automatically launch with the same dark theme you just enabled, creating a uniform working environment.
Customizing Your Dark Mode Experience
While enabling the global dark mode sets a consistent baseline, WPS Office offers additional customization to fine-tune your visual experience. Returning to the Options menu, you can explore settings that control specific elements. For instance, within the “View” settings of WPS Spreadsheets, you might find options to adjust the color of gridlines in the dark theme, making them more or less prominent against the dark cells.
Another important consideration is document canvas color. Enabling the dark interface theme changes the surrounding application frame, but the open document page in Writer or the slide in Presentation may remain white by default to ensure content readability and proper printing formatting. However, for pure on-screen editing, you can often change the page color itself. In WPS Writer, for example, you can go to the “View” tab and select “Page Color” to choose a dark shade for the editing area, creating a fully immersive dark workspace.
For the most up-to-date features and advanced customization plugins, a visit to the WPS official website is highly recommended. The website’s download and support sections often contain the latest versions of the software where theme controls are most refined and stable. The WPS official website also hosts community forums where users share tips and custom themes, allowing for an even more personalized interface beyond the default dark options.
Troubleshooting Common Dark Mode Issues
Occasionally, users may encounter issues where the dark mode does not apply correctly or appears inconsistent. If the theme does not change after applying settings, try closing and fully restarting the WPS Office application. A fresh launch will often load the new theme properly.
If the theme applies to one application, like Writer, but not to Spreadsheets, it may indicate a version mismatch between the installed applications. Ensure that all components of WPS Office are updated to the same version. The easiest way to do this is to use the built-in update checker, accessible from the help menu, or by downloading the latest installer from the WPS official website. Installing the latest suite ensures all features, including theme synchronization, work harmoniously.
In some cases, particularly on Windows 10 or Windows 11, there might be a conflict with the system-wide dark mode settings. You can experiment by toggling your Windows theme between light and dark to see if it forces WPS Office to follow suit. WPS Office generally follows its own internal settings, but checking the system can help diagnose display glitches. Should problems persist, the comprehensive support resources available on the WPS official website provide detailed troubleshooting steps and contact information for technical assistance.
Conclusion
Activating and using dark mode across all WPS Office applications is a simple yet transformative adjustment that enhances usability, comfort, and style. By accessing the unified settings menu and selecting a dark theme, you instantly apply a consistent, eye-friendly interface to WPS Writer, Presentation, and Spreadsheets. The ability to further customize elements like page color ensures the experience can be tailored to your specific needs, whether you are drafting documents, crafting presentations, or analyzing complex data. For the smoothest experience, always ensure your software is current via the WPS official website. Embracing dark mode is more than just an aesthetic choice; it is a practical step towards a more sustainable and comfortable digital workflow, allowing you to focus on productivity without the glare. The commitment to user-friendly features like this solidifies WPS Office as a compelling choice for modern professionals and students alike.